Showing posts with label paper beads. Show all posts
Thursday, May 23, 2013
Works in Process
Hi to all,
Here's a glimpse at my most recent garage sale finds. Great, right? The earrings will be wonderfully in a black and gold bracelet I'm working on. And I love those big black beads, haven't really decided what to do with them yet.
As promised last week. I was going to give you some of my steps in creating a new necklace from an old broken on. Here's the old necklace:
Step 1: Disassemble the necklace. Take apart the beads and carefully remove the metal charms.
Step 2: Using head pins, string the beads along with seed beads creating "new" charms for your necklace.
Step 3: I used an old recycled chain as the base for my new necklace. See below.
Step 4: Take the metal pieces and arrange them between the head pin charms, going for an effect of fullness. Attach the metal pieces with gold jump rings.
Step 5: I wanted to make the necklace still fuller, so I decided to add some paper beads. I am making them a variety of sizes. Once they are done I will put them on head pins with other beads and attach them to the necklace also. Beads are below, drying!
Stay tuned....Next week, hopefully, the necklace will be finished.
And please, check out my etsy shop
See you next week,
anne
Saturday, May 11, 2013
Mother's Day and Spring
| 1916 Mother's Day post card |
Happy Spring and happy Mother's Day. Mother's day is a celebration honoring mothers and motherhood that is held all over the world. In the US, the holiday is celebrated on the second Sunday of May.
Mother's Day celebrations date back to the ancient Greeks and Romans who held festivals to honor the mother goddesses Rhea and Cybele. The closest precedent to the modern Mother's Day is an early Christian celebration called "Mothering Sunday".
The roots of the modern Mother's Day start with Ann Reeves Jarvis, who organized "Mother's Day Work Clubs" to teach women how to care for their children. In 1868, these clubs were called "Mothers' Friendship Day", women gathered with union and confederate soldiers to promote reconciliation.
The official Mother's Day holiday started in the early 1900's as a result of the efforts of Ann Jarvis, daughter of Ann Reeve Jarvis. She wanted to honor mothers and their sacrifices. Ann lobbied hard for President Wilson to make Mother's Day a national holiday and her persistence paid off in 1914.
After Mother's Day became a national holiday, it was not long before florists, card companies and other merchants capitalized on their popularity. Jarvis had hoped the holiday would become a personal celebration of mothers, but by 1920, she was disgusted with how the holiday had become commercialized. She disowned the holiday, By the time of her death in 1948 . Now the holiday is one of the biggest holidays for consumer spending!
| An Old Necklace |
Be sure to stop by my Etsy shop, have a wonderful week.
anne
Thursday, March 21, 2013
Here it is!
Hi to everyone,
| Ozma of Oz Necklace |
Well, here it is; my Ozma of Oz necklace. You can see some of the steps in making in the necklace in my previous blog. There is also a complete tutorial describing the process of making these paper "beads" in my November 11, 2011 blog. I posted the necklace on Etsy a few days ago. You can see it there by clicking on the picture caption above.
Now I am working on a Wizard of Oz project made from the pages of a copy of the original edition.
Spring is just around the corner, some of the crocus have poked their purple heads up through the ground. The first day of spring will be March 20th and Easter is March 31st. So the Spring Craft Fairs can not be far behind! Here we go again, my second season of craft fairs.
First on the agenda is an Earth Day Fair at Pleasantville Middle School on April 11. I love participating, it is really a workshop. I can teach kids all about paper beads and how to make them. It teaches them that we can make beautiful things out of what we throw away.
And here is a sample of bringing old designs back! This bracelet is made from the pages of the Sunday magazine section of the newspaper. Available by special order at annemadethis@gmail.com.
Talk to you soon,
anne
Now I am working on a Wizard of Oz project made from the pages of a copy of the original edition.
Spring is just around the corner, some of the crocus have poked their purple heads up through the ground. The first day of spring will be March 20th and Easter is March 31st. So the Spring Craft Fairs can not be far behind! Here we go again, my second season of craft fairs.
First on the agenda is an Earth Day Fair at Pleasantville Middle School on April 11. I love participating, it is really a workshop. I can teach kids all about paper beads and how to make them. It teaches them that we can make beautiful things out of what we throw away.
| Sunday Morning Paper Bead Bracelet |
And here is a sample of bringing old designs back! This bracelet is made from the pages of the Sunday magazine section of the newspaper. Available by special order at annemadethis@gmail.com.
Talk to you soon,
anne
Thursday, November 8, 2012
"Literary" Paper Pendant Tutorial
| Jane Eyre Necklace |
| Alice in Wonderland Bracelet |
| Alice in Wonderland Pendant |
If you have been keeping up with my blog, I know you have seen my "literary" jewelry pieces. The were made from the pages of old or reproductions "classics". Below is a basic tutorial to make one of these pieces for yourself from your favorite novels!
MATERIALS:
small piece of corrugated cardboard
eye pins not more than 1" (I prefer to use silver plated findings, they
always look nice and shiny)*
1.5-2" head pins*
5mm-6mm & 8mm jump rings*
1-bail*
a few small/medium beads to add to your necklace orbracelet (optional)
old style classic book, one with illustrations or decorated text
Tacky glue
Triple thick(R) gloss glaze
toothpicks
styrofoam egg carton
paper plate
Black paint
Black magic marker
silver chain, suede cord or rubber cord
Black paint
Black magic marker
silver chain, suede cord or rubber cord
TOOLS: scissors, jewelry pliers and wire cutters, 1/4" soft and 1/4" stiff brush, hot glue gun skewer and awl
STEPS:
1. Take corrugated cardboard and cut into two ovals or circles about the size of a quarter or a little larger. This will be the "focal bead" of your necklace. I used ovals and circles in my pieces, but really any shape is fine. You may want to add smaller "beads" to your necklace, cut those out now too. The smaller beads on the Alice in Wonderland bracelet and the Jane Eyre necklace were crafted from one disk of corrugated cardboard. This will probably work with your design also. I used quarters for the larger beads and nickels as templates for my smaller beads.
2. For the focal bead, or the largest bead; line up the 2 eye pins in the center of the piece. Now using a hot glue gun, set the two pins in position.
3. Using the hot glue gun again, glue the two pieces together (like a sandwich), with the eye pins on the inside. Make sure both eye pins stick out and the pieces are lined up evenly.
4. Paint using thick black paint all around the edges of the piece. This gives a more finished look to your focal bead. You can also paint around the smaller pieces or even use a black magic marker to finish off those edges.
5. Set the smaller "beads" aside. Now you can decorate your "focal bead" with pieces of the text or illustrations from your "classical" text. Cut out words, illustrations or designs, really anything you want. Glue to focal bead with tacky glue using the soft brush. Remember to decorate both sides. Try to use words and images representative of the book. Let glue dry.
6. Using the same basic techniques, decorate the smaller disks or beads. Before gluing words or images, poke a small hole about 1/8" from the circumference of the disk. We will use this hole later for attaching a jump ring. Now decorate your disks as you did your "focal bead". Once glue is dry, re-poke hole with awl, then pierce again with a toothpick. This should enlarge hole.
8. While pendant is drying, we can assemble the beads which hang below the "focal bead" (from the eye pin). String beads on the head pin. Use the remainder of the headpin to form a loop. For more detailed instructions on how to make headpin loop, go to this link. Then using a jump ring attach the headpin to the eye pin on the bottom of the pendant. If you are not sure about these last directions, go to the links, that will help.
9. Last step is to put on bail or a jump ring. If you plan to wear your pendant bead alone on a rubber or leather cord, attach bail to the top eye pin. Then slide it on the cord. If you are wearing pendant bead as a necklace or bracelet with the other disks on a chain, attach a jump ring to the disks and they will easily attach to a chain. Have fun with it and enjoy!! I'd love to see your creations.
Tuesday, September 18, 2012
Workshop-Making Cards from Recycled Materials
| The table full of supplies |
| Tags |
Yesterday, a wonderful supportive daughter and friend participated in my "practice workshop". It looks like they were having fun. During this workshop, crafters learned to make cards from recycled materials using a variety of techniques including rolled paper beads, woven paper strips, collage and origami. We used recycled magazines, book pages, newspapers and blank cards. We also used paper punches and magic markers. Above are some of the tags we made. Below are some more cards:
| Collage card |
| Tube bead & paper punch card |
Going through this practice workshop helped me time the activities and make a thorough list of supplies. I am sure this "practice" will be invaluable in making the workshop in November a total success. Besides the types of cards pictured above, we made a lattice card. This card is made from strips of recycled paper, the more varieties the better! To make a lattice card, just follow the directions below. You will be using a frame card, made to display photos
1. Put two pieces of ½” double faced tape on each
end of a blank card that can be inserted in the frame. Lay ½” strips
across the insert card spanning the two pieces of tape. Position the first strip in the center of
the card. Then put 3 strips on each side
leaving almost 1/4” on each edge. Butt
strips next to each other. You will use
about 7 strips. This forms the framework
for weaving. Trim when done.
2. Now
weave the other strips through the framework, going over/under every other
frame work strip. Space strips evenly
across the card. You will use about 9 strips. I used white strips here, so you could see the process.
3. When
you get the strips placed the way you like them use a dab of glue to hold each
end in place. Trim ends.
4.
Once it is dry, slide insert card with paper weaving in the pocket, so it shows
in the frame. Now decorate front of card
as desired or write a greeting.
Try making a few of these cards, every card comes out differently!
Be sure to check my Etsy site this week.
Talk to you all soon,
anne
Monday, August 20, 2012
Tube Bead Bracelet Tutorial
"Color is my daylong obsession, joy and torment."
-Claude Monet
![]() |
| San Giorgio Maggiore Venice at Twilight |
| Memory Wire Bracelet-Spring Green |
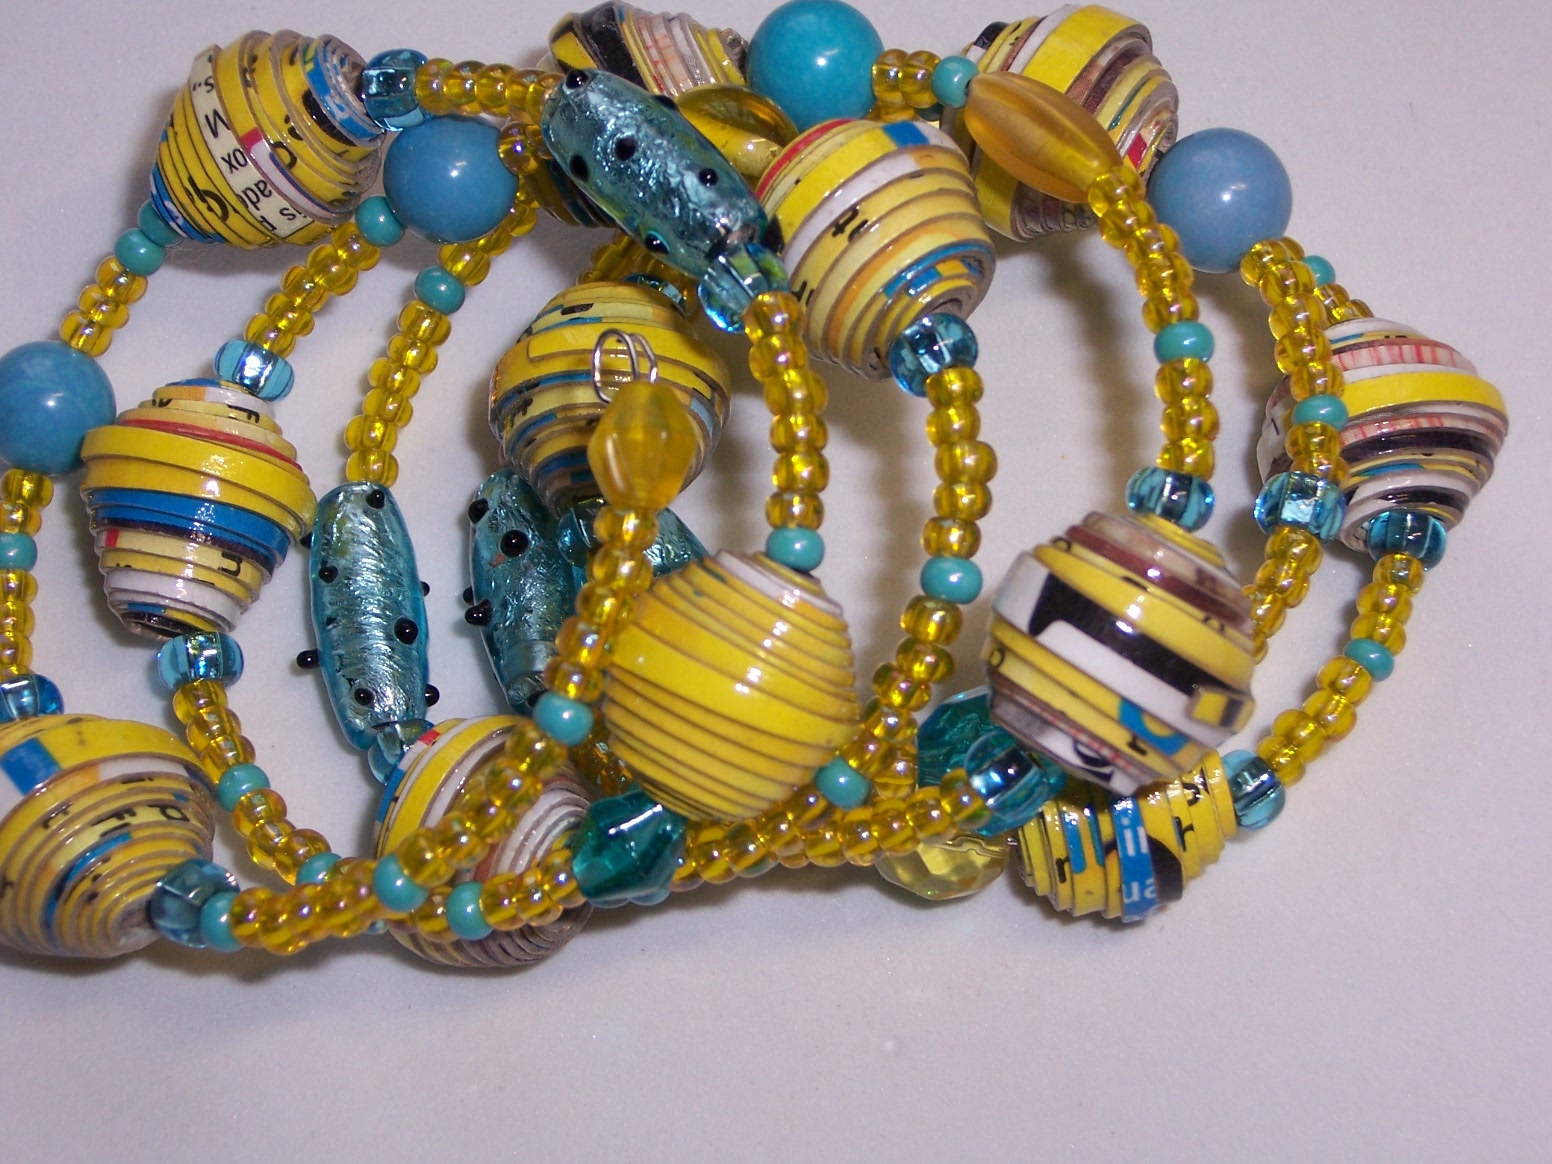
| Memory Wire Bracelet-Yellow Cereal Box 2 |
| Wine Glass Charms made with Paper Beads |
These are some things that I worked on this week, of course more memory wire bracelets! But I will stop those soon. They just look so dramatic on your wrist. The newest item is a set of wine glass charms. They are fun at parties, help guests keep track of their drinks and make great hostess & holiday gifts. Check my Etsy site for postings.
TUBE BEAD BRACELET TUTORIAL
Above are examples of the Elastic Tube Bead Bracelet. Each bracelet looks very different, depending on the paper used to form the bead. To start, you will need about 32 3/4" long beads to make the bracelet. (Directions for making beads are on my July 16, 2012 post. ) You will also need about 55" of 1mm. clear elastic to make the bracelet.
1. Take the first bead and center it on the elastic, keeping both ends even.
2. Take one end of the elastic and thread it through the second bead, take the other end of the elastic and thread it through second bead from the other end. Pull both ends of the elastic tight. Make sure both hanging ends of elastic are even and the two beads are laying flat.
3. Continue in this manner, threading the beads from each end of the elastic. Be sure to keep bracelet and tighten after each bead until bracelet measures about 7 1/2"-8" (will stretch to fit almost any size wrist).
4. Hold both ends of elastic and pull each bead, starting with the second bead, to tighten the preceding bead. This will remove all of the slack from the elastic thread.
5. Take each end of the elastic and string through opposite ends of the first bead. This will make your flat bracelet into a loop. Pull tight.
6. Take one end of the elastic thread and thread it through the bead adjacent to the first bead. Both ends of the elastic will be on the same side.
7. Make sure all is tight and then knot elastic several times. Put a dot of cement, GS-Hypo cement or E6000 and the knot will be secure forever. Let dry and cut off remaining elastic.
Try these directions out. If they seem complicated, let me know where and I will try to clarify them. Have fun!
Be sure to check out my Etsy shop and like me on Facebook.
Talk to you soon,
anne
Saturday, August 11, 2012
New Ideas and Things
| Vintage pins made from very old buttons, Havre de Grace, MD |
Hi to everyone,
Last weekend I traveled to Maryland. One of the stops I made was Havre de Grace where I visited an amazing button shop. The proprietor was 77 years old and had been collecting buttons since she was a child. I wish I had taken more pictures, the shop was stuffed with all kinds and colors of vintage and antique buttons. She made these pins about 35 years ago. I thought they were unusual, interesting.
| Paper bead memory wire bracelets by annemade. this |
I have developed another way to make the Collage Art bead. Originally I had posted a short tutorial on this in on February 2, 2012. Well here is another way to get some of the same effects. Below is a sample of some Collage art beads I made today.
| Collage art beads |
2. Take colored tissue paper (the colors you want your beads to be) and rip it in sections. Glue it all over the cereal carton front in a haphazard manner. See picture.
4. After it is dry, turn carton over and trim excess. Draw triangles the size you want. Cut and roll triangles as shown in the tutorial of January 9, 2012.
5. You may add other embellishments, such as string, ribbon, glitter or more tissue at this point. Then coat the bead with two coats of ultra-thick gloss. Let dry thoroughly.
If there are any questions, please contact me. Happy crafting! Would love to see some examples of what you do.
Stop by my Etsy site and like me on facebook!
Talk to you soon,
anne
Sunday, July 1, 2012
More Vintage Buttons and Jewelry
Hi to all,
I just know there will be tons of creations inspired by all of the buttons and jewelry pieces in the jar I started a few weeks ago. And my collection grows steadily as others clean out their jewelry boxes. This week my mother-in-law added some very unusual vintage jewelry to my collection. I can not believe the earrings we wore in the 80's; really, what were we thinking? Do any of you remember? Above are just a few examples of what we found in her jewelry box.
| Teal Blue Vintage Button Bracelet |
| Chunky Paper Bead Necklace with Vintage Earrings |
And this piece was crafted from my sister-in-law's earrings. Wow! Right, those acylic yellow wedges were really earrings. I think they look great strung with chunky paper beads, acrylic beads and wooden beads on a rubber cord. And the earrings add a little unusual character that makes this a real statement piece. The necklace will be listed on Etsy next week, please check for it.
And last, I will be at the Peekskill Jazz & Blues Festival on Saturday, July 21st. The crafts and food start about noon and the music is later. It looks like the festival will take up several blocks of downtown Peekskill and parking is free. And it will be the debut of my craft fair tent!
Thanks, I'll talk to you soon,
anne
Subscribe to:
Posts (Atom)
