Monday, August 27, 2012

More Uses for Paper Beads

Memory Wire Bracelet-Violet Cereal Box
Halloween Bracelet


Greetings All,

Although it's not getting cooler, it is getting darker earlier and earlier now.  We are seeing a few of the first signs of fall. Another sign of the season, I'm making my paper beads in darker more jewel like colors now.  Take a look at the violet memory wire bracelet, the colors are deep and rich--perfect for fall fashions.  

And I've made a bracelet for Halloween, each bracelet has a couple of paper beads and a Halloween lamp work glass bead.  So cute and lots of fun for little girls.  I'll have these bracelets at the Croton Fall Arts Fair; Saturday, October 27th.  Just in time for Halloween!  If you want the bracelet sooner you can leave a comment on this blog or contact me through my Etsy shop.

Another Craft Idea
As the holiday season rolls around, you can make great cards and tags with paper beads embellishments.    These cards and tags will cost a fraction of what you pay in the card shop.  And you will be recycling those  magazines you have!

Use  toothpicks to roll these beads, so they will be nice and tight.  Follow the basic directions for the tube paper beads in my earlier tutorial.  I usually do not glaze the beads used for cards and tags. They come from glossy magazine stock and they just look better left as is.    Here are some samples I made.


The candles, the rays of the sun and the branches of the tree are all thin tube paper beads.  They are cut from magazine pages, rolled on tooth picks and glued.  Once the paper beads were dry, they were glued to the cards.   Looks like fun, right?!!

Check my Etsy site for new things and let me hear from you soon.

See you all soon,
anne

Monday, August 20, 2012

Tube Bead Bracelet Tutorial


"Color is my daylong obsession, joy and torment."
                                                                   -Claude Monet

San Giorgio Maggiore Venice at Twilight


Memory Wire Bracelet-Spring Green
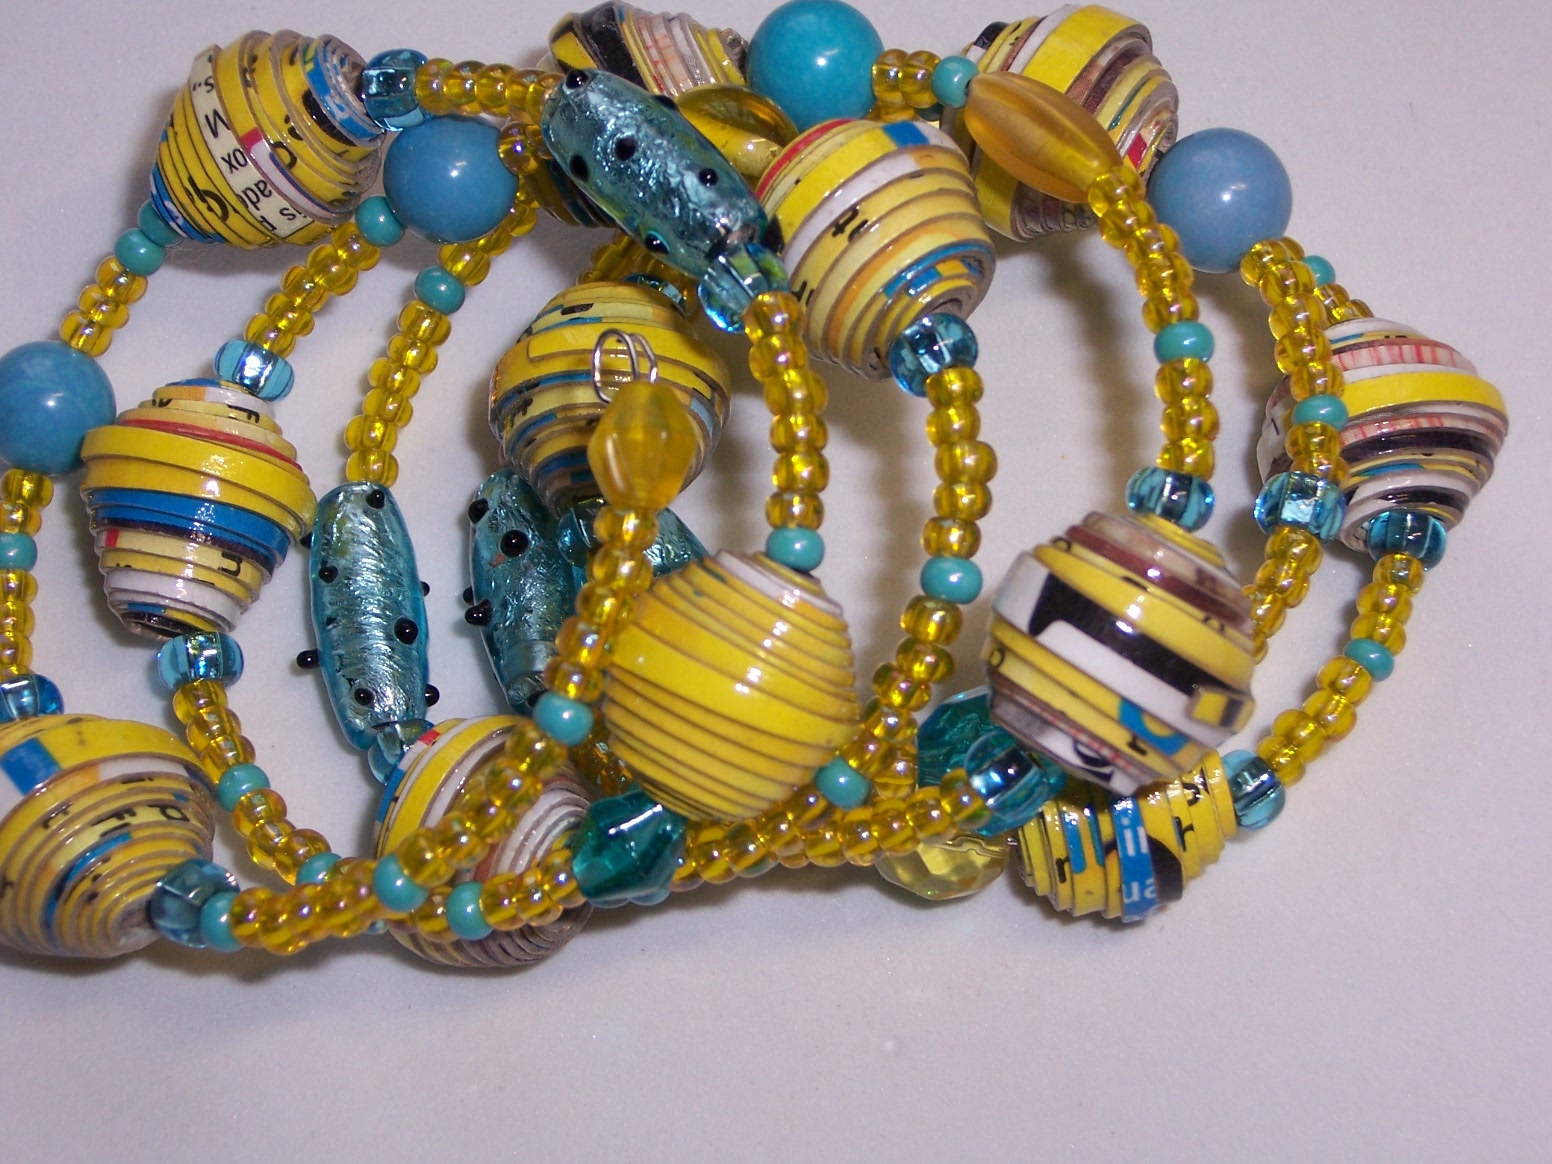
Memory Wire Bracelet-Yellow Cereal Box 2


Wine Glass Charms made with Paper Beads
These are some things that I worked on this week, of course more memory wire bracelets!  But I will stop those soon.  They just look so dramatic on your wrist.  The newest item is a set of wine glass charms.  They are fun at parties, help guests keep track of their drinks and make great hostess & holiday gifts.  Check my Etsy site for postings.


TUBE BEAD BRACELET TUTORIAL


Above are examples of the Elastic Tube Bead Bracelet.  Each bracelet looks very different, depending on the paper used to form the bead.  To start, you will need about 32  3/4" long beads to make the bracelet. (Directions for making beads are on my July 16, 2012 post. ) You will also need about 55" of 1mm. clear elastic to make the bracelet.

1. Take the first bead and center it on the elastic, keeping both ends even.

2. Take one end of the elastic and thread it through the second bead, take the other end of the elastic and thread it through second bead from the other end.  Pull both ends of the elastic tight.  Make sure both hanging ends of elastic are even and the two beads are laying flat.


3. Continue in this manner, threading the beads from each end of the elastic.  Be sure to keep bracelet and tighten after each bead until bracelet measures about 7 1/2"-8" (will stretch to fit almost any size wrist).


4. Hold both ends of elastic and pull each bead, starting with the second bead, to tighten the preceding bead.  This will remove all of the slack from the elastic thread.

5. Take each end of the elastic and string through opposite ends of the first bead.  This will make your flat bracelet into a loop.  Pull tight.

6. Take one end of the elastic thread and thread it through the bead adjacent to the first bead.  Both ends of the elastic will be on the same side.  


7. Make sure all is tight and then knot elastic several times.  Put a dot of cement, GS-Hypo cement or E6000 and the knot will be secure forever.  Let dry and cut off remaining elastic.

Try these directions out. If they seem complicated, let me know where and I will try to clarify them.  Have fun!

Be sure to check out my Etsy shop and like me on Facebook.


Talk to you soon,


anne


Saturday, August 11, 2012

New Ideas and Things


Vintage pins made from very old buttons, Havre de Grace, MD

Hi to everyone,

Last weekend I traveled to Maryland.  One of the stops I made was Havre de Grace where I visited an amazing button shop.  The proprietor was 77 years old and had been collecting buttons since she was a child.  I wish I had taken more pictures, the shop was stuffed with all kinds and colors of vintage and antique buttons.  She made these  pins about 35 years ago.  I thought they were unusual, interesting.

Paper bead memory wire bracelets by annemade.  this
Above are some memory wire bracelets I made last week, incorporating my paper beads.  They are posted on  my online Etsy site annemadethis.  These wire bracelets wrap around your wrist 5-6 times, they form a 2" cuff.  Very luxurious!  The colors are spectacular!  Check them out.

I have developed another way to make the Collage Art bead.  Originally I had posted a short tutorial on this in on February 2, 2012.  Well here is another way to get some of the same effects.  Below is a sample of some Collage art beads I made today.

Collage art beads
 1.  Start with a panel from a cereal box or any other light cardboard carton.  The more white and pale areas there are on the box, the more pronounced the color effects will be.  Using a medium size paint brush, cover the entire carton front with white glue in an even layer.

2. Take colored tissue paper (the colors you want your beads to be) and rip it in sections.  Glue it all over the cereal carton front in a haphazard manner.  See picture.


3. Make sure the tissue and glue dries thoroughly and that all pieces of tissue are firmly adhered to the carton.  Sometimes a little glue brushed on top of the tissue helps this.

4. After it is dry, turn carton over and trim excess.  Draw triangles the size you want.  Cut and roll triangles as shown in the tutorial of January 9, 2012.

5. You may add other embellishments, such as string, ribbon, glitter or more tissue at this point.  Then coat the bead with two coats of ultra-thick gloss.  Let dry thoroughly.

If there are any questions, please contact me.  Happy crafting!  Would love to see some examples of what you do.

Stop by my Etsy site and like me on facebook!

Talk to you soon,

anne

Wednesday, August 1, 2012

Looking towards the fall

Henri Rousseau
Hi to all,

Boy the hotter and muggier it gets around here, the slower and muggier my brain gets.  It seems like we are in the middle of a rain forest  summer today! 

We found out the other day that our booth made the local news services.  There were a couple of photos taken at the  Peekskill Craft Fair, you can see them if you follow this link.  We are in photos #7 and #8. 

I've been working on some custom orders lately.  I love collaborating with a customer and incorporating their new ideas into a project.  Here is a bracelet I've been working on.  The original bracelet I posted several weeks ago is teal & turquoise buttons; my friend wanted her bracelet to be made of black & white vintage buttons.  This is what I have so far, what do you think?


So even though it is only the first of August, it seems the calendar for the fall and the holiday season
is rapidly filling up.  Tentatively, I already have the following scheduled:

                                    October 27: Croton Arts Fair
                                    November 3: Greenburgh Nature Center Workshop
                                                          & Holiday Sale
                                    December 1: Tarrytown Holiday Fair

I will certainly keep all of my local fans informed about when and where I will be this fall.

So as I learned the hard way last winter, now is the time to start stocking up on your best sellers and reworking the stuff that is stale.  I have gotten some good constructive criticism from friends and family on displays and jewelry pieces, I am working on putting those ideas in place.  Also customers have given me ideas on new pieces they would like to see. So it is work, work, create create now.

Check my Etsy shop for new postings!
Talk to you soon,

anne
                                  

Wednesday, July 25, 2012

Glorious Saturday

Hi to all,
Anne and Tori

What a glorious Saturday for the Jazz and Craft Fair. It was wonderful and would have been totally impossible without the help of my daughter Tori and my sister Kaye Lynn. There were over 2000 participants listening to live music, dancing, browsings the crafts and eating! By the way, our new canopy worked prety well, only one snafu we have to check out.
Anne and Tori setting up
Tori and Kaye Lynn
Later on, we are tired!!
 Now I'd like to give a shout out to one of my fellow Etsy artists--Emmy Williams.  She believes in recycling and reusing to create her art.  Emmy makes her pieces from recycled paper, plastic, glass,and metal  You can check it all out at her shop on the Etsy site Emmysgreenthings.

And finally my new item of the week.  I have reworked my memory wire bracelets to include paper beads and wrap around your wrist six times. The bracelet forms a cuff about 2".


Please check the bracelet out my Etsy site this week. 

Talk to everyone soon,

anne

Monday, July 16, 2012

Tubular Paper Bead Tutorial

Jane Eyre Bracelet
Nature Book Bracelet
Chinese Menu Bracelet


Hi to all,

Above are some examples of tubular paper beads I have made into bracelets.  One reason I like the tube bead is that it really shows off the materials it was made from.  You can actually see Chinese menu items or the text from Jane Eyre.  Today I would like to go through a step by step process in making a tubular paper bead.  It is really quite easy, once you practice two or three times.


1. To start off you need a skewer, tacky glue, a soft brush and strips of medium weight paper, cut 3/4" X 6".  Here I am using a page from my vintage atlas. To make a bracelet like the ones shown above, you should roll about 32 beads, so start with 35 strips, just in case.


2. To start rolling, place the strip under the skewer as shown.  Tuck ends around and start to roll.  Keep strip snug and both ends even.  If it unrolls, just start again, this has happened many times to me.


3.  Roll to about an inch from the end.

4. Using the soft brush, spread tacky glue on the inch long tail.


5. Finish rolling the bead, holding tail down until glue dries.  Then gently slide bead off skewer, keeping edges even.  See photo below.


6. I place the finished bead on two toothpicks and stick it into an egg carton to dry.  That should take only a few minutes.


7.  The last step, coat the bead twice with an ultra-thick gloss.  Let it dry thoroughly between coats..  And now you have a bunch of tubular beads ready for crafting. Hope you enjoyed the tutorial and special thanks to my beautiful hand model, Tori!


Looking forward to meeting everyone this Saturday, July 21st at the
Peekskill Jazz and Craft Fair
For Festival details, visit www.downtownpeekskill.com


Happy crafting.  Please check out my etsy shop.


anne

Tuesday, July 10, 2012

Peekskill Craft Fair Coming Soon


Stretch Bracelet made from
 nature book pages
Chunky Bracelet made from Nature Book
beads, vintage buttons and glass beads
Both of these items will be brand new at the Peekskill Fair, come take a look. Nice fall colors!


Peekskill’s 6th Annual Jazz & Blues Festival
Saturday, July 21, 2012 1pm-10pm
 free outdoor concert and fair that will be held in historic Downtown Peekskill, at the intersection of Central Avenue and North Division Street. 

 Craft Alley, (1pm – dusk) featuring a variety of finely crafted handmade goods by local artisans, for sale.

  Jazz & Blues Brunch  (1 – 4pm) the best local music at restaurants and cafes around town.
  Food Court: samplings of area foods, art & family events, Peekskill Farmers Market and  more!     
  Main stage starts at 4pm:
      Masters of Latin Jazz, Multi-Grammy® nominated Bobby Sanabria & Ascensión 
      Marc Cary Focus Trio
      Lakecia Benjamin & Soul Squad
      Nation Beat

 The Annual Peekskill Jazz & Blues Festival attracts thousands of people from across the tri-state area, and has become one of Westchester's premiere summer musical and creative events. Visitors are encouraged to come early and stay late!
 One Hour From NYC on Metro North + Free Peekskill Trolley Making Regular Loops Direct To  Festival!
For Festival details, visit www.downtownpeekskill.com


Here's my booth, it's bright yellow and you can't miss it.  My sister Kaye and my daughter Tori will be there with me!  So stop by, see my new stuff and see my new tent.

Remember if you see something you like but would like a color change or a metal change; let's talk.  Although my pieces are one of a kind, their are many items that can be custom made for you.

See you soon,
anne