
Last week I left you with half of the instructions to make your own chunky bracelet. I had just finished laying the buttons out on my bracelet base, trying to find the best design using the buttons and old earrings I had on hand.
Once I decide on a design, it's time to glue the buttons to the circular sections of the bracelet base. Some buttons have shanks on the back. Likely, you will have to remove them to get a good tight fit. (Don't cut shanks off a valuable buttons, it will make them worthless.) Use E6000 jeweler's glue to glue the buttons and/or earrings to the bracelet base. I have always had good results with it. This is how the bracelet looks now:

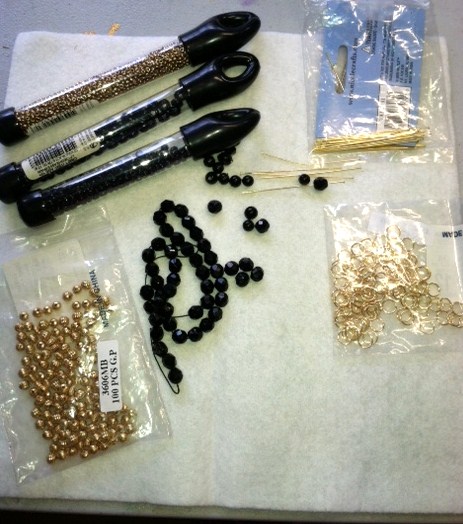
The next step is to create the charms that will be dangling from the bracelet. I am going to use gold and black beads from my stash. I also use quite a few seed beeds when I make charms. And, you will need gold 7-8mm jump rings and 2" gold head pins. Here are the materials you will need for this step:
Each charm is made with a headpin and several different beads, you can add as many beads, in as many sizes as you want. The more beads you add the longer the charm is. Let your own creativity be your guide. Just save enough of the headpin to twist into a loop.
The bracelet base I used has 13 links. The two end links are part of the closure so I did not put charms on them. So, I needed charms for 11 links, at least 22 charms. I made about 25.

Next, take one jump ring, open it, add one or two charms and then attach it to the bracelet link. Continue this process until you have attached charms to all of the links. The charms should hang free so they move when the bracelet is worn.

I didn't like the way my charms looked on the bracelet, I moved them around a bit and added a third charm to some of the links. I also made another charm with a much larger bead to hang from the large flower button. A kind of "focal charm". Here's what the bracelet looks like once I got the charms the way I wanted them.

Now I really like it!! That big charm in the center is exactly what it needed. A beautiful bracelet made from old buttons, earrings and beads.
If you have any questions, or get stuck making this bracelet just leave me a comment and an email address. I'll get back to you ASAP. Send me pics of what you made, I'll post them here.
Stop by my Etsy site. And thanks; see you soon,
anne

.JPG)
